About the Reports Tab/Page
Table of Contents
Syncro provides a robust reporting module that can help you turn data into actionable insights.
You can schedule and download reports, select specific reports as your favorites, and even build your own customized reports using our Report Builders.
This document provides an overview of the information you’ll find in the Reports tab (also known as the Reports module).
Locate Syncro Reports
To access Syncro's full list of reports, click the Reports tab in the Syncro header. Or, you can navigate to Admin > Syncro Administration - Reports:

The Reporting page contains an action button bar (1), a search feature (2), a section for Report Builders (3), and additional sections of reports available in Syncro (4).
Report Builders are available for Internal Reports and Executive Summary Reports.
Additional sections include:
- Customer Reports
- RMM Reports
- Sales Reports
- Ticket Reports
- Invoice Reports
- Employee Reports
- Inventory Reports
- Profit & Loss Reports
- Payment Reports
- Tax Reports
- Warranty Reports
- Email and SMS Reports
You can use the action button bar (1) to Favorite Reports, Schedule Reports, Download Reports, and view Import Results.
Favorite a Report
Note: There are some reports you can't save as Favorites. Before you begin (or if you have problems), you may want to check the Reports That Can't Be Saved As Favorites or Reports That Can't Be Saved After Filtering lists.
To save a report as a Favorite, follow these steps:
- Navigate to the Reports page, then click the hyperlinked name of a report. (We'll use the Vulnerable Systems report from the RMM section as our example.)
- Complete any fields to create the report so that it includes the data you want. (And if applicable, adjust settings so the report looks the way you want--e.g., order of rows, columns shown, etc.):

- Click Run Report.
- Click Save Favorite. The Save Report Favorite pop-up window appears:

- Give the report a Name, and click Save Favorite.
Reports That Can't Be Saved As Favorites
| Module | Report Name |
|---|---|
| (Customer) Organizations | Customer Export Customer Map |
| Email & SMS | Communications Summary Consumables Usage Inbound Emails Summary |
| Inventory | Inventory Changes Inventory Changes By Date Inventory Stockout Product Labels |
| Invoices | Invoice Export Line Item Export |
| Payments | Payments Summary Unsettled Payments |
| Profit & Loss | Charts |
| Sales | Sales Overview |
| Tickets | Recurring Tickets Resolved Tickets Ticket Export |
| Warranties | Warranties by Expiration Date |
Reports That Can't Be Saved After Filtering
| Module | Report Name |
|---|---|
| (Customer) Organizations | Customer Detail Referrals |
| Email & SMS | Communications Summary |
| Invoices | Refund |
| Sales | Payments by Day Sales Detail |
| Tickets | Reworked Tickets |
Access Favorite Reports
After you've saved specific reports as Favorites, they appear:
- At the top of the Syncro Reporting page for easy access:

- When you click *Favorites at the top of the Syncro Reporting page:

This is also where you can Rename, Edit, and Delete your report favorites.
Schedule a Report
Note: Only people created as End Users and Syncro Users can receive reports you schedule.
To schedule a report, follow these steps:
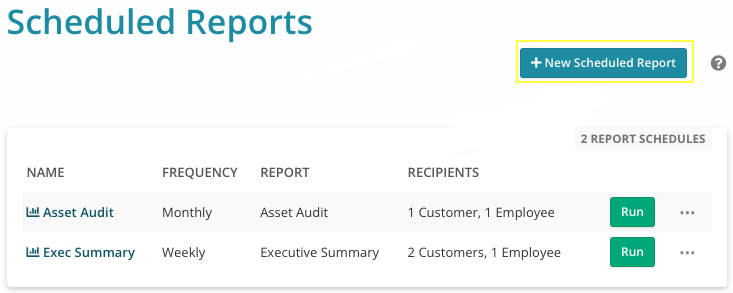
- Navigate to the Reports page, then in the upper right, click Scheduled Reports. The Scheduled Reports page/table displays.
Tip: You can also schedule most reports using the Schedule button that appears in the upper-right corner of the page Syncro displays after you click the specific report name ( ).
).
- Click +New Scheduled Report:

Syncro displays the Create Report Schedule page:
- In the NEW REPORT SCHEDULE section:
- Enter a Name for the Scheduled Report.
- Use the Reports dropdown menu to select the report you'd like generated.
Note: Syncro only supports scheduling the reports displayed in this menu. - Use the Report Date Range dropdown menu to select the timeframe you'd like to include data for in your report.
- Specify the Frequency for the scheduled report.
- Use the Run Next At calendar to pick a start date.
- In the Email Body, enter any text you want to appear in the email sent when the Scheduled Report runs. You can use HTML tags, such as <strong>, to format the text.
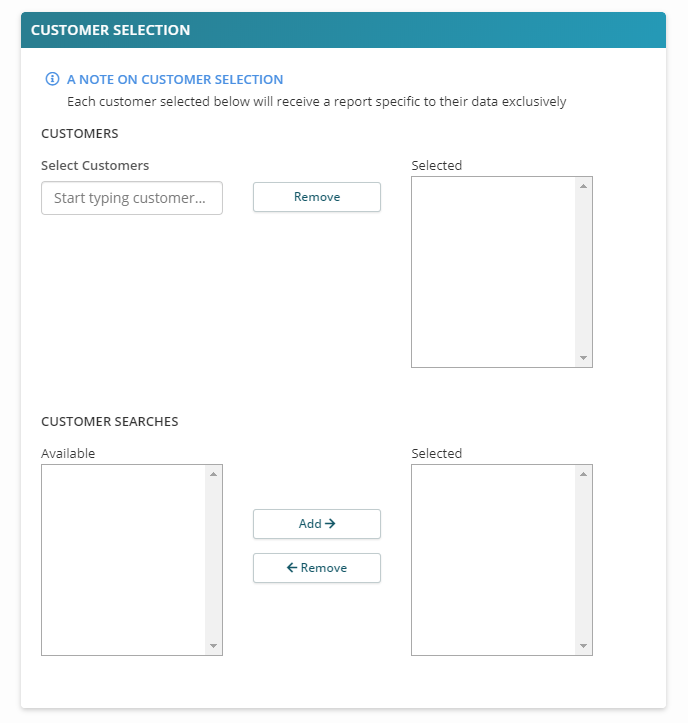
- Depending on your selection from the Reports dropdown menu, a CUSTOMER SELECTION may appear next:

You can Search for Organizations to add those whom you want to receive a copy of the report (specific to their data only).
Syncro will send the report to the main address assigned to the Organization. If you have any, you can add Organizations via Saved Organization Searches as well.
Notes:
- Only Organizations/End Users that have the "Receive Report Emails" box checked will receive these emails. This setting is available when you create or edit an Organization.
- If a customer qualifies for multiple copies of the same report (e.g., if duplicate Organization records or report schedules exist), Syncro will only issue the report once.
- In the INTERNAL RECIPIENTS section, select any Syncro Users who should receive the Scheduled Report:

If desired, check the “Internal Use Only” box. When this box is checked, selected Organizations will only be used to create the content of the report; emails will only go to Syncro Users. - Click Save Report Schedule.
Download a Previously-Generated Report
Click Download in the upper right of the Syncro Reporting page to view a list of previously generated reports that you can download:

Tip: You'll often find reports that take a long time to generate (because they're large) here.
Click the hyperlinked report name in the File column to start a download. Click the red X at the far right to clear out any reports listed here.
View Import Results
Click Import Results in the upper right of the Syncro Reporting page to lists the results of all files that have been imported, along with links to those successfully imported:

You may have imported Organizations, End Users, and/or Products, and those will appear here.
Search for a Report
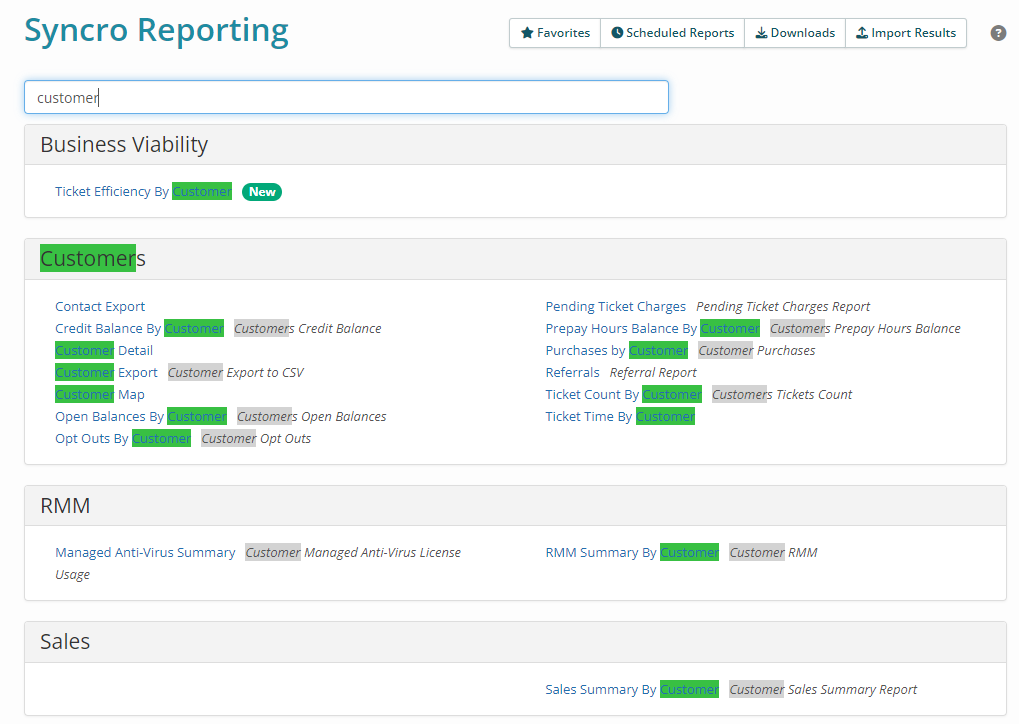
Just start typing and Syncro narrows down the list of reports to those matching what you type:

Your matching search term highlights in green.
