Create a Contract
Table of Contents
Snippet: Create a Contract
A Contract is an agreement you have with your clients.
Contracts can be as simple as defining a start/end date for an antivirus subscription, or as complex as a managed service contract with defined product discounts and Service Level Agreements (SLAs).
In Syncro, all your client contracts are stored together in the Contract Manager.
Watch this short video to learn more:
Prerequisites
If you want to use a Service Level Agreement (SLA) as part of your new contract, you should create it first.
Create the Contract
To create a new contract, follow these steps:
- Select the Contracts tab from the tab bar. If available, a list of existing items appears in the Contract Manager table.

- Click +New Contract. The New Contract page displays.

- Begin typing a Customer's name and select the Customer. Then name the contract, give it an estimated likelihood of closing, provide a start and end date, a primary contact, and description.
- If you have an SLA you'd like to associate with this contract, select it from the list:

- Check the "Contract Applies to All Tickets" box to apply this contract to the Customer you selected for all tickets going forward. Leave it unchecked to prevent tickets from being under contract automatically. (You can manually associate a ticket with a contract from the Ticket Details Page.)
- Click Create Contract. The Contract Details page displays, where you will specify the details for the contract:
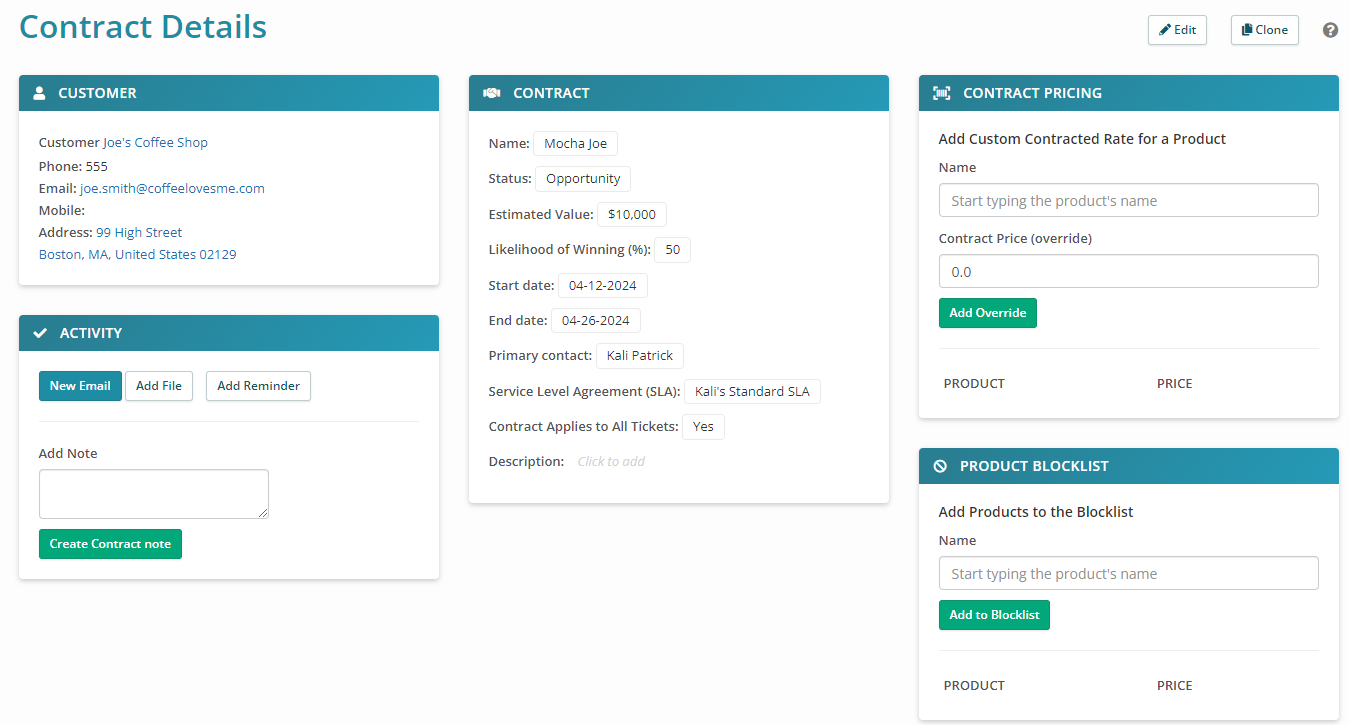
Tip: If you take some time to create Contracts for your various service offerings now, you can quickly pull them up and use the Clone feature whenever you sign/sell a new contract.
Specify Details for the Contract
The Contract Details page contains several sections you can use to manage the contract. Each is described in the sections below.
Customer
The Customer section displays basic information about the Customer:
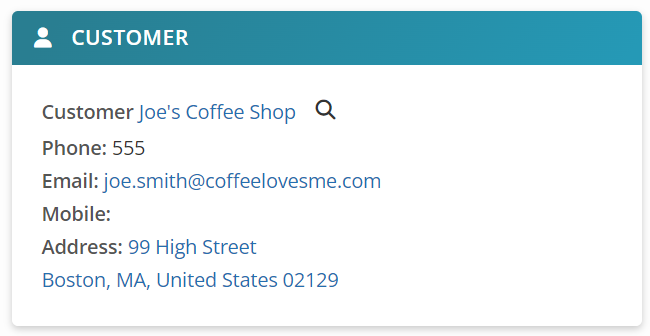
Hover over the Customer's hyperlinked name for the More Info hourglass, which lets you preview additional information or navigate to that Customer's Details page.
Click the Customer's address to display the location in Google maps.
Tip: You can also see any contracts associated with your customer in the Contracts Section of their Customer tab:

Activity
The Activity section helps you communicate with the Customer about the contract:
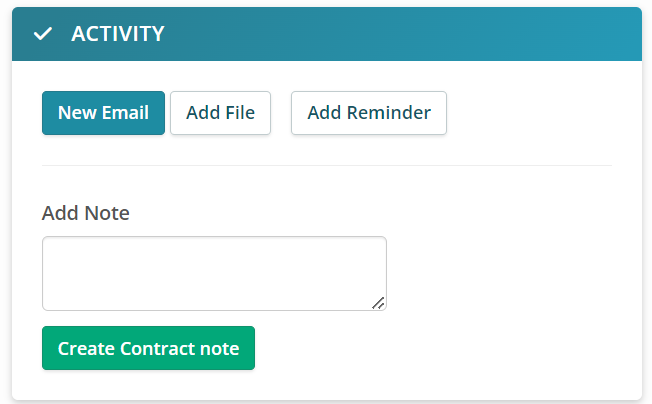
The first two buttons launch pop-up windows:
- Click New Email to send an email to the Customer. Any files you previously attached are available in the Attach Files dropdown menu. The Emails you send display in the Communications section, further down the page. They are also available in the Communications subtab for the Customer.
- Click Add File to upload any files related to this contract. The files you upload here are available from the Attach Files dropdown in the Compose Email popup window. They also display in the Attachments section, further down the page:

Click Add Reminder to load a canned message with a reminder for a Syncro business user to review the contract. Specify the time for the reminder, and select the Tech before saving. Or, click Add Reminder a second time to hide the reminders fields.
Tips:
- Click All Reminders to see a list of the reminders already sent. (This may only be available after you've added a reminder.)
- Contract reminders appear at the top of the Customer's Details Page, where you can decide to Edit, Snooze, or Dismiss them:

Use the Add Note field to add any notes to the contract. Click Create Contract Note to save it. The Notes you enter display in the Notes section, further down the page:

Contract
The Contract section displays basic information about the Contract. Click into any of the fields to quickly modify a value:
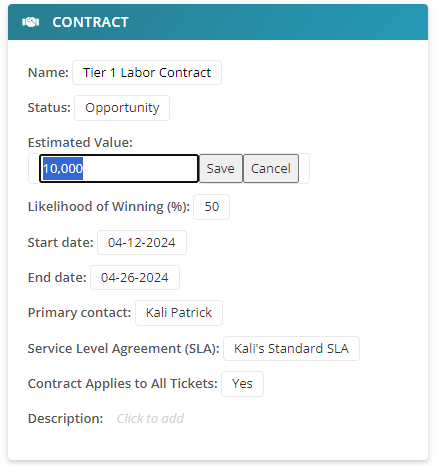
Tip: This is similar to clicking Edit at the top of the page.
Contract Pricing
The Contract Pricing section lets you set special rates for customers on any of your products and/or services as part of this contract (including labor).
Start typing a product's name in the Name box, and select one. The standard price appears in the Contract Price field. Change the price to what you'd like it to be for this contract, then click Add Override:
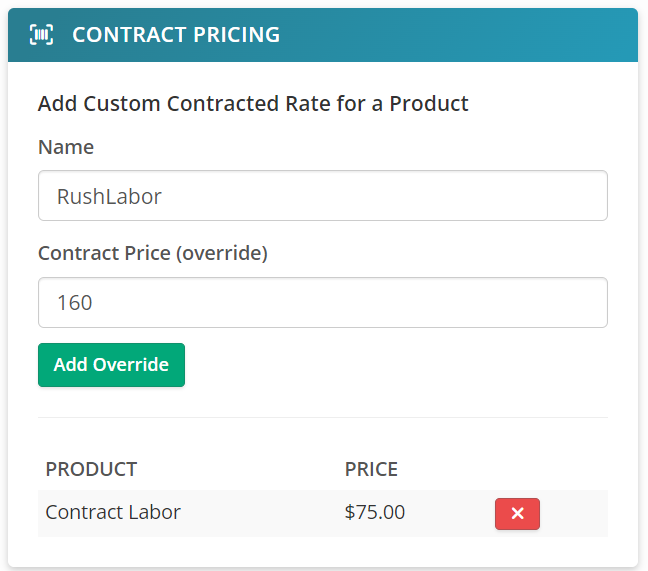
The Product and (contract) Price appears at the bottom of the section. Click the red X to remove it.
You can set contract pricing for multiple products and services here.
When you go to an invoice and add the line item, it will automatically apply the discount.
IMPORTANT: Once a contract rate is created, it will override any manual changes you make when clicking “Add/View Charges” on a Ticket's Details Page. If you change or add a contract, only line items added after that change will be affected. Previously added line items will remain at the settings that were in effect when they were added.
Product Blocklist
The Product Blocklist section helps you prevent the selling of specific products and/or services to the Customer attached to the contract.
Start typing a product's name in the Name box, and select one. Then click Add to Blocklist:

The Product and its Price appears at the bottom of the section. Click the red X to remove it.
You can add multiple products and services to the blocklist.
Non-Billable Labor
The Non-Billable Labor section is where you can designate which Labor Rates/Products are Billable and which are Non-Billable. Then, whenever someone creates a Ticket associated with the contract, the Labor Rates use that setting.
This way, your technicians won't have to think about whether a Labor Rate is billable or non-billable, and you can vary your contracts for different Customers.
Note: The Products dropdown is pre-filtered to only show products of type “Labor.” For more information about creating Labor Rates/Products, see Create Labor Rates.
Use the Products dropdown to search for and select a Labor Rate:

Syncro displays the selected Product's description:

Tip: Click the x in the Products dropdown to de-select it, or simply select a different Product.
Click the + at the far right. Syncro displays the Labor Rate/Product as non-billable for tickets under this contract:

Repeat to add as many non-billable labor rates/products as you like.
Note: Currently, any time entries created from Syncro's Mobile App are considered Billable. We are planning to support Contract-level controls in future updates of the Syncro Mobile App.
Recurring Invoices
Any Recurring Invoices associated with this contract appear in the Recurring Invoices section:

When you create a recurring invoice, you have the option to assign a contract
See also Create a Recurring Invoice.
