About the Calendar Tab/Page
Table of Contents
This document provides an overview of the information you’ll find in the Calendar tab, and the calendar-related actions you’ll be able to take on the page. (This is also known as the Calendar module.)
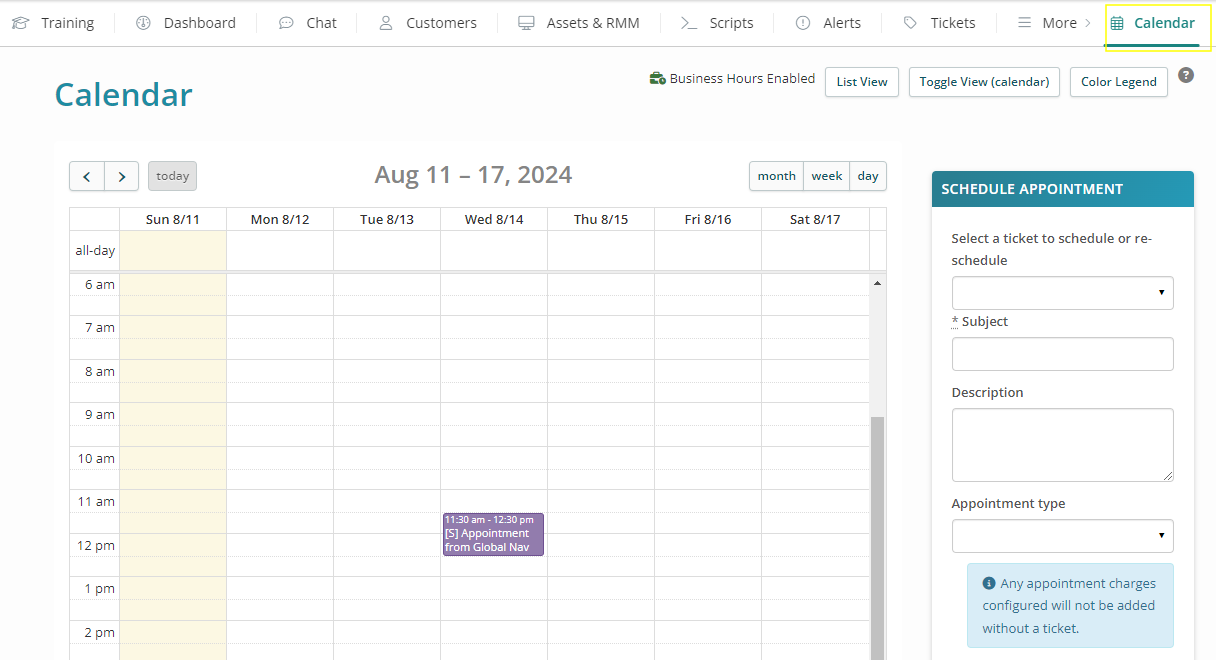
Click the Calendar tab in the Syncro header to display the Calendar page:

Note: If you don't see the Calendar tab, it may be under the More menu. Customize which tabs display and in which order using the Tabs Customization option from your Syncro User Profile menu.
From any of the Calendar Views, you can:
- Drag and drop an appointment to change it. (This won't notify the customer.)
- Hover the mouse over an appointment to see basic information (e.g., Subject, Location).
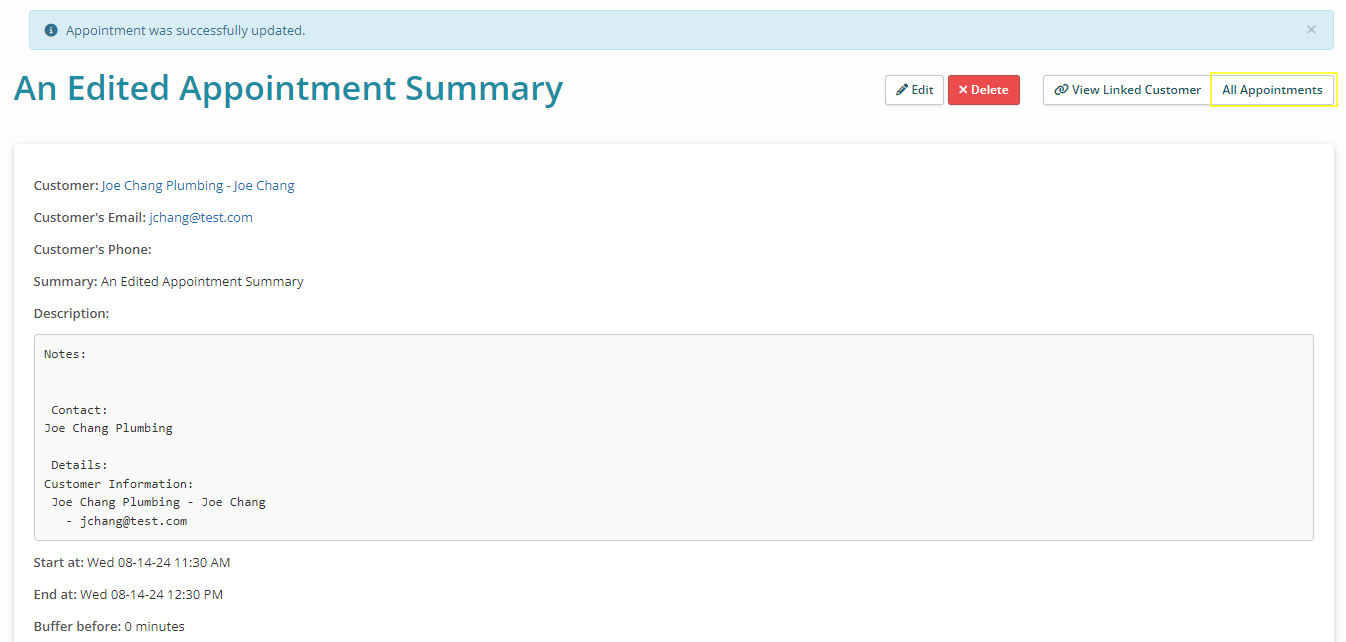
- Click an appointment to see a Summary page, which also allows you to Edit or Delete the appointment, or view the Details Page for the Organization linked to the appointment.
- Click All Appointments to display Upcoming Appointments (30 Days) as in the List View.
- View the Color Legend.
About the Color Legend
Regardless of which calendar view you're looking at, you'll see a Color Legend button. Click it to be reminded of the colors associated with each User/technician shown on your calendar:

Note: Admins can edit users' color assignments in Admin > Syncro Administration - Users using the “Calendar Entry Color” field. See User Fields Reference for details.
Default View
The default calendar view displays your calendar on the left, and the SCHEDULE APPOINTMENT sidebar on the right (as shown above).
The upper right corner has a group of buttons that provide information and allow you to change to different calendar views:

Note: If your Syncro account has set and enabled Business Hours, this is noted on the calendar.
List View
Click List View to display the calendar as a list of Upcoming Appointments for the next 30 days (by default):

Use the buttons at the top of the Upcoming Appointments (30 Days) page to view:
- All: Every appointment ever created in Syncro. When there are many appointments, these are shown 30 appointments/page.
- Past: Any appointments that occurred prior to today's date. When there are many past appointments, these are shown 30 appointments/page.
- Upcoming (All): Any appointments scheduled for a day/time that's later than when you're viewing the calendar, in the order they will happen.
- Upcoming (30 Days): Any appointments scheduled for a day/time that's later than when you're viewing the calendar, but with a limit of 30 days.
Note: Recurring appointments do not sync with Syncro, so you won't see these on your calendar.
Click Calendar View to return to the Default View.
Tip: You can also edit and delete appointments in the List View. When you edit an appointment, Syncro displays the Appointment Detail page in edit mode, and when you click Update Appointment, displays a page like this one, with the Summary at the top:

You'll need to click All Appointments to return to your calendar's List View.
Toggle View
Click Toggle View (Calendar) to change to a horizontal view that doesn't include the SCHEDULE APPOINTMENT sidebar, and gives you options to view appointments assigned to all User/technician accounts (depending on your permissions):

- Click New Appointment to open the NEW APPOINTMENT pop-up window. You can also click into a calendar cell/square to display this.
- In the upper right, use the buttons to toggle the calendar by Month, Week, (upcoming) 3 Days, or (current) Day. Then, when you use the < (previous) and > (next) arrow buttons, the calendar will skip based on that increment. Click Today to return to the current day:

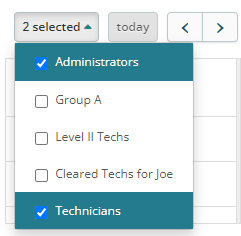
- In the Technicians column, check the boxes next to each to see their appointments. You can specify which Technicians are display in the Technicians column using the Security Groups dropdown menu:

- Click Toggle View (Calendar) to return to the Default View.
Calendar Only View
The Calendar Only View displays your Syncro calendar with no sidebars, headers, or footers.
Given appropriate permissions, this can be useful on a larger, public monitor set to full screen: you can display a calendar and appointments to everyone in the office.
To access the Calendar Only View, add /calendar to the end of the URL that displays when you first click the Calendar tab.
For example: https://XX.syncromsp.com/field_jobs/calendar (where XX is your subdomain).
 Documentation Center